Special Introductory Offer - Get Service Lightning for Only $149/month!


How To
How To Use Service Lightning
How to Use Service Lightning
Welcome to our how-to guide. We know there's a lot to our application and we want you to get the most out of it. Here, are step-by-step instructions on our most commonly used features. If you have any questions, reach out to us, we're happy to help!
How To Invoice
Step 1: Click the New Invoice/Quote button.

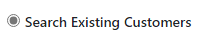
To invoice an existing customer, select search existing customer.
Step 2: Type the customer's name in the search field.

Step 3: Select the customer from the drop-down list.
Step 4: IMPORTANT -- click the service address to autofill the customer information.

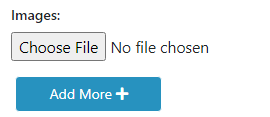
Step 5: Images are optional but can be used to attach pictures of completed service items
Step 6: Input all necessary product and service details.

Step 7: Optional -- Add any service or technician notes if applicable.
Step 8: if you have set up technicians, choose the technician involved.
Step 9: Optional -- if you are tracking job hours, have the technician enter the total number of working hours.
Step 10: Decide whether to Save for Later or send the invoice now.
Step 11: If you would like to save the service items or parts used in the invoice, you can choose to add any parts to use again on subsequent invoices.
You have the option to pass credit card processing fees on to your customers. If you enable this in the settings, the fee amount will automatically appear here.
Step 12: Get paid!
To invoice and add a new customer select Add New Customer.
Once you have entered the customer information, follow the above steps to create your invoice and get paid!
How To Point Your Domain to Our Server
The easiest way to direct your domain to our server is to point your DNS to our nameservers. If you wish to use our email services, you will need to use this method.
To add our nameservers follow these steps.
Step 1: These are our nameservers
- ns19092178123.a2dns.com
- ns19092178157.a2dns.com
Step 2: Access Your Domain Registrar's Control Panel:
Log into the account where your domain is registered (e.g., Namecheap, GoDaddy, Bluehost).
Step 3: Navigate to DNS Settings or Nameserver Management:
Look for an option like "DNS Settings," "Manage DNS," "Domain Management," or something similar. This might be under a section related to your domain or in an advanced settings area.
Step 4: Update the Nameservers:
You'll see fields where you can enter nameserver information. Delete any existing nameserver entries if necessary, then enter the nameservers provided above.
Make sure to save or apply these changes and then you will need to wait for propagation.
DNS changes can take anywhere from a few hours to 48 hours to propagate globally. During this time, some visitors might see the old site while others see the new one.
Last step: Verify the Change:
After some time, you can verify that the changes have taken effect by using a DNS lookup tool like https://dnschecker.org/.
If you want to point just the A record, follow these steps. Do this if you want to use your own email, or have your own website.
Step 1: Our Server IP Address: 190.92.178.157
Identify your server's IP address: This is the public IP address of your server where your website files are hosted. You can usually find this in your hosting control panel or by contacting your hosting provider.
Step 2: Access Your Domain Registrar
Log into your domain registrar's website (e.g., GoDaddy, Namecheap, Bluehost):
Navigate to the DNS settings or domain management section for your domain.
Step 3: Update DNS Records
Add or update an A record:
Type: Select 'A' (Address Record).
Host/Name: For the main domain, this is usually left blank or can be "@". For subdomains like "www", enter "www".
Points to/Value: Enter your server's IP address.
TTL (Time To Live): This can be left as default (often around 14400 seconds or 4 hours) or set to a lower value for quicker updates if needed.
Here's an example of what the settings might look like:

Step 4: Update Nameservers (If Necessary)
Sometimes, if you're using a new hosting provider or DNS service, you might need to update the nameservers:
Go to your domain settings.
Replace the existing nameservers with the new ones provided by your host or DNS service.
Step 5: Wait for Propagation
DNS changes can take time to propagate globally:
Expect anywhere from a few minutes to 48 hours. The TTL you set affects this time.
Step 6: Test Your Setup
Check if it's working by visiting your domain in a web browser to see if it loads from your server.
How to Buy a Domain
Type your desired domain name into the box to determine availability.
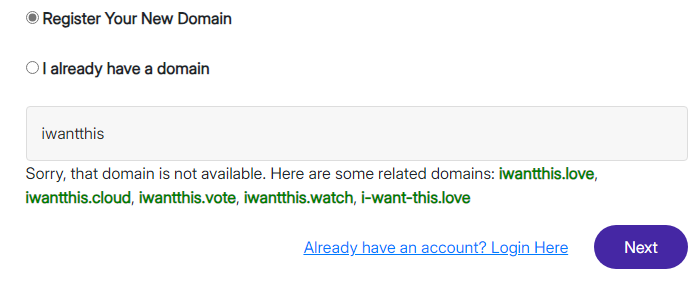
Our system will prompt you if possible until a domain is available.
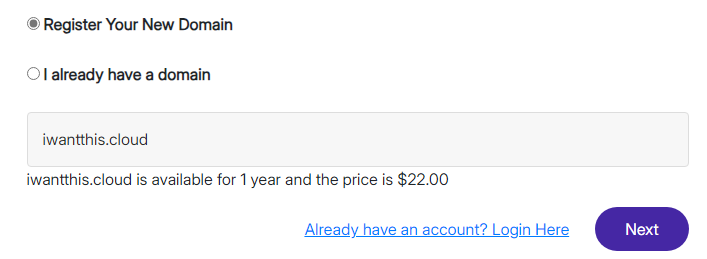
Proceed with your sign up and you will receive an email from the registrar confirming your email address. It is important to do this within 24 hours to avoid cancellation of your domain.
How do Your Customers Pay
Via Emailed Invoice
Step 1: After you generate and send the invoice, your customers will get an email containing a "Pay Now" link.
Step 2: By clicking this "Pay Now" button, the customers will be taken to your payment page where they can input their credit card details.
Step 3: Once payment is processed, funds will be automatically transferred to your bank account within three business days, provided you've fully registered with Stripe. That's it!
Via Point-of-Sale Hardware
Step 1: Generate and email an invoice to your customers as before, but this time, select the "Pay with Stripe Reader" button.

Step 2: Ensure your Stripe Reader device is powered on and has an active internet connection.
Step 3: The amount from the invoice will show on the Stripe Reader, ready to accept a tapped, inserted, or swiped credit card.
Step 4: Your invoice is paid!
Via Virtual Terminal
Step 1: Generate and email an invoice to your customers as before, but this time, select the "Process Card" button.

Step 2: You will be taken to a screen to enter the card details.
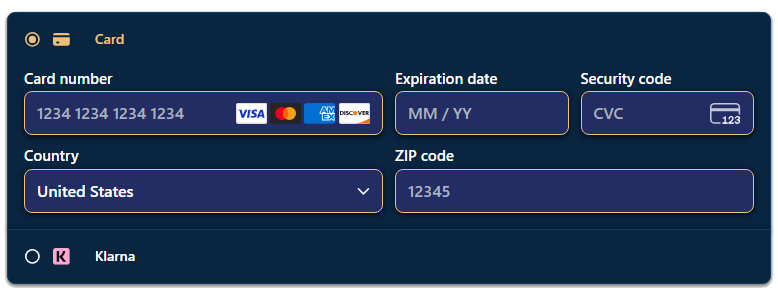
Step 3: Enter all of the five field's (Card Number, Expiration Date, Country, Billing Zip Code, and Security Code) information.
Step 4: Click Pay Now and your invoice is paid!
Available Invoice Actions
Edit -- reopens the invoice to edit the information
Delete -- deletes the selected invoice
Send -- sends or resends the invoice to the customers
Send SMS -- sends the invoice information and a payment link via text message
Payment Reminder -- sends a payment reminder notifcation email (and SMS if enabled) manually. Payment reminders can be configured to be sent automatically in the settings
Due -- this drop-down will allow you to mark an invoice as paid
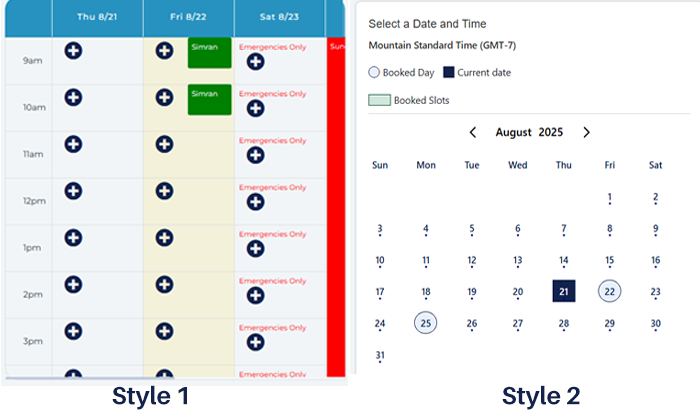
How to Use the Schedule
Step 1: Choose a calendar style in the settings.
Step 2: Define your work hours by setting your start and end times for the day on the settings page.

Step 3: Determine the length of each appointment slot by setting the Slot Duration.
Step 4: Toggle the visibility of the booking scheduler on your Home page by selecting 'Yes' or 'No' for Enable Booking Calendar.
Step 5: With these settings, you've now established the basics for automatically accepting scheduling appointments.
Setting Blocked Days
Step 1: To manage unavailable times, navigate to Block Days and Slots in the settings menu.
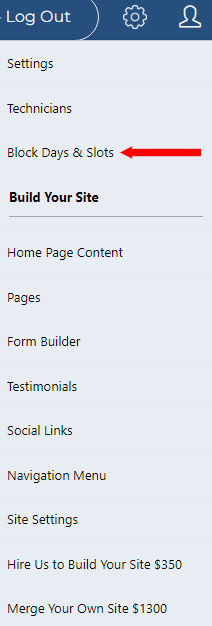
Step 2: Select Add Block Day/Time Slot.

Step 3: From the dropdown, choose your block type:
- Day Block: Specify the date and provide a reason for blocking it. The entire day will be unavailable.
- Slot Block: Enter the date along with the start and end times you want to block. Only those specified times will be unavailable.
- Every Week: Choose the day of the week you want to block permanently. For instance, block Saturdays if you wish to avoid scheduling appointments on the weekend.
- Multiple Days: For extended periods like vacations, set the range of dates and times you want blocked. Add a reason to inform your customers about the unavailability.
How to Email
Step 1: Set up your deired email addresses in Email Accounts. You can assign email addresses to technicians.

Available Email Actions
Check Email -- opens the window for the selected email address
Assign Email -- assign the selected email address to a technician
Edit Email Account -- edit the account details including storage limits
Delete -- deletes the email account
Step 2: Managing emails is straightforward and similar to many of the other webmail clients. You can also use your favorite email client.

How to Set Up Service Plans & Recurring Billing
Step 1: Click on Plans and Start with Manage Plans
Step 2: Create a Plan
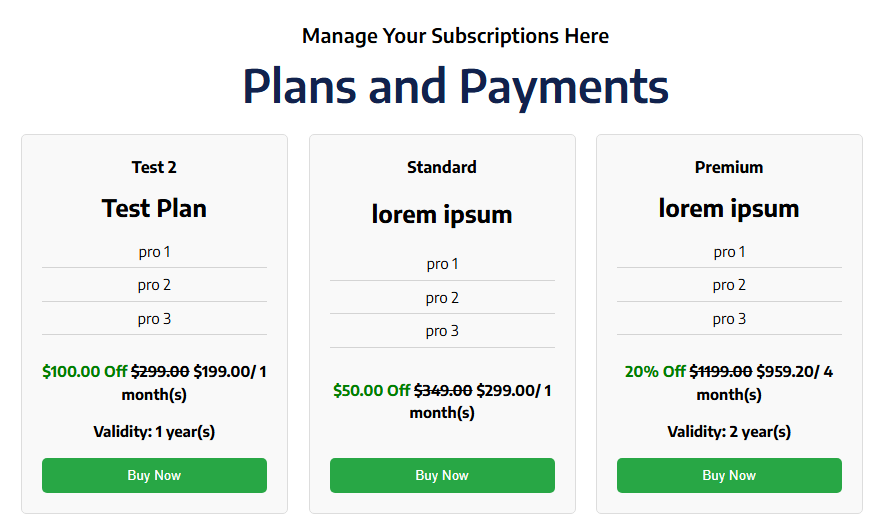
Here, you'll configure the price, duration, frequency of billing and service, and if you collect payments after service is rendered or simply by time period. You can also name your plan and set up a discount that is unique to the plan. Finally, you're given an editor to design the appearance of the plan that will show automatically on your website under the "Plans" link.
Step 3:Check the status box if you're ready for the plan to go live and then click submit.
Example of Plans Page:
Manage Plan Subscribers
Step 1:Click View Subscribers
Available Plan Subscriber Actions
Active Button -- Change Subscription Status
View Payment History -- Review plan payments
Update Card -- Update the subscriber's card details
Customers are automatically sent their account details where they can manage their payment methods and update/cancel their subscriptions.
How to Build Forms
Forms are valuable tools to get information out of visitors to your website. You can create custom forms for estimating or for clients to agree to certain terms. The possibilities are endless!
Step 1: Click on Form Builder in the Settings Menu
Step 2: Create on Add Form to build your first form
Step 3: Name the form and start by choosing an available form component.
Available Form Components
- Text Input: Creates a single-line text field for user input.
- Text Area: Provides a multi-line text input field for longer user input, like comments or descriptions.
- Drop Down Menu: Creates a dropdown menu for users to select one or multiple options from a list.
- Checkbox: Displays a box that users can check or uncheck for multiple selections.
- Radio: Displays a button for selecting one option from a group.
- File Upload: Allows users to select and upload a file from their device to the server.
Step 4: Once you have created a form, you can add it to any of your website pages from the "Pages" controls.
Step 5: All created forms are visible from the Form Builder page. Click the eyeball to see your collected form submissions.